사설인증서 생성을 위한 OpenSSL 사용방법 입니다.
간단하게 Access Gateway (Netscaler) 를 통해 생성하셔도 되고.. OpenSSL을 통해 생성하셔도 되겠습니다.
1. OpenSSL 다운로드
http://code.google.com/p/openssl-for-windows/downloads/list 에서 32비트 또는 64비트 버전을 다운로드 합니다.
2. 압축해제 후 해제된 폴더의 libeay32.<wbr />dll, ssleay32.<wbr />dll 파일을 %Systemroot%\System32 폴더에 붙여넣습니다.
3. OpenSSL 폴더 하위에 아래그림과 같이 demoCA 폴더를 생성합니다.
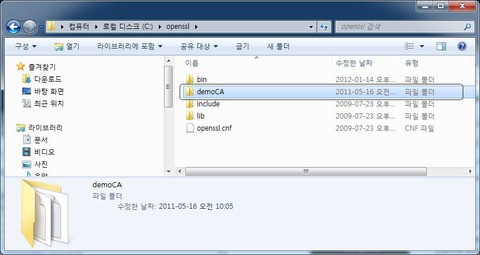
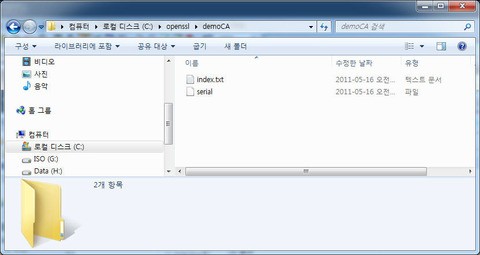
4. DemoCA 폴더 하위에 serial 이라는 파일을 생성합니다. (주의) 확장자가 없습니다.
5. index.txt 텍스트 파일을 생성합니다. index.txt 파일에 00 (숫자) 입력 후 저장합니다.
6. OpenSSL 폴더 하위에 있는 openssl.cnf 파일을 OpenSSL > Bin 폴더로 복사합니다.
이제 OpenSSL 사용을 위한 준비는 완료되었습니다..
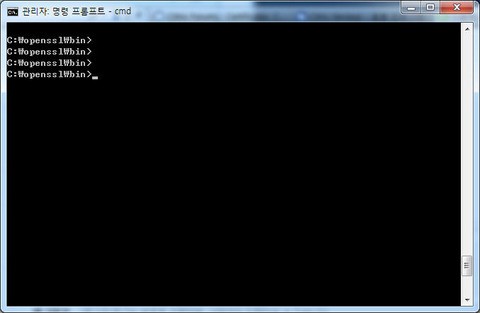
7. CMD 실행 후 OpenSSL > BIN 폴더로 이동합니다.
*** 사설인증서 생성
1. CA 인증서 생성
1.1 CA인증서의 키를 생성하기 위해 아래 명령어를 입력합니다. 완료 후 CA.key 생성됨
C:\openssl\bin>openssl genrsa -des3 -out CA.key 1024
Loading 'screen' into random state - done
Generating RSA private key, 1024 bit long modulus
....................++++++
....................++++++
e is 65537 (0x10001)
Enter pass phrase for CA.key: XXXX
Verifying - Enter pass phrase for CA.key: XXXX
1.2 CA인증서를 생성하기 위해 아래 명령어를 입력합니다. 완료 후 CA.crt 생성됨.
C:\openssl\bin>openssl req -new -x509 -days 365 -key CA.key -out ca.crt -config openssl.cnf
Enter pass phrase for CA.key: Cakey의 pass Phrase 입력
Loading 'screen' into random state - done
You are about to be asked to enter information that will be incorporated into your certificate request.
What you are about to enter is what is called a Distinguished Name or a DN.
There are quite a few fields but you can leave some blank For some fields there will be a default value, If you enter '.', the field will be left blank.
Country Name (2 letter code) [AU]:
State or Province Name (full name) [Some-State]:
Locality Name (eg, city) []:
Organization Name (eg, company) [Internet Widgits Pty Ltd]:
Organizational Unit Name (eg, section) []:
Common Name (eg, YOUR name) []: CA인증서의 도메인 명이 되므로 신중하게 입력 (ex. CA.daou.com)
Email Address []:
2. 서버인증서 생성
2.1 서버인증서의 키를 생성하기 위해 아래 명령어를 입력합니다. 완료 후 Server.key 생성됨.
C:\openssl\bin>openssl genrsa -des3 -out Server.key 1024
Loading 'screen' into random state - done
Generating RSA private key, 1024 bit long modulus
.......................................................++++++
.........................................................++++++
e is 65537 (0x10001)
Enter pass phrase for ad.key:
Verifying - Enter pass phrase for ad.key:
2.2 서버인증서의 CSR 생성을 위해 아래 명령어를 입력합니다. 완료 후 Server.csr 생성됨.
C:\openssl\bin>openssl req -new -days 365 -key Server.key -out Server.csr -config openssl.cnf
Enter pass phrase for ad.key:
Loading 'screen' into random state - done
You are about to be asked to enter information that will be incorporated
into your certificate request.
What you are about to enter is what is called a Distinguished Name or a DN.
There are quite a few fields but you can leave some blank
For some fields there will be a default value,
If you enter '.', the field will be left blank.
-----
Country Name (2 letter code) [AU]:
State or Province Name (full name) [Some-State]:
Locality Name (eg, city) []:
Organization Name (eg, company) [Internet Widgits Pty Ltd]:
Organizational Unit Name (eg, section) []:
Common Name (eg, YOUR name) []: DNS에 등록된 도메인명과 동일하여야 함. 불일치 시 오류. ex) vpn.daou.com
Email Address []:
Please enter the following 'extra' attributes
to be sent with your certificate request
A challenge password []:
An optional company name []:
2.3 CA로 부터 생성된 CSR 이슈 및 서버인증서를 생성합니다. 완료 후 Server.crt 생성됨.
(중요) 대소문자 주의
C:\openssl\bin>openssl x509 -req -in Server.csr -CA ca.crt -CAkey ca.key -CAcreateserial -out Server.crt -days 365
Loading 'screen' into random state - done
Signature ok
subject=/C=bb/ST=bb/L=bb/O=bb/OU=bb/CN=KRXAD1.oa.org/emailAddress=bb@bb.bb
Getting CA Private Key
Enter pass phrase for ca.key:
생성된 Server.crt, Server.key를 메모장으로 연 후 Server.key의 내용이 위쪽에 오도록 파일을 병합합니다.
병합 후 Server.crt 로 저장합니다.
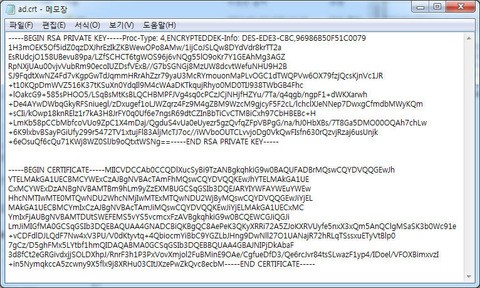
생성된 CA.crt(루트인증서), Server.crt(서버인증서) 를 이용하시면 되겠습니다..
더 많은 OpenSSL 이용방법은 http://www.openssl.org/docs/apps/openssl.html 를 참고 하세요..